%20(1000%20×%20700%20px)%20(1000%20×%20650%20px)%20(1000%20×%20670%20px)-700x500w.png)
How to installatlion Laminate Click Flooring
%20(1800%20×%20600%20px)-1920x600w.png "How to installatlion Laminate Click Flooring")
How to installatlion Laminate Click Flooring
For Urban 8mm and 12mm Laminate Flooring
A) Before Installation
Temperature and humidity conditions of the floor and areas where laminate flooring is to be installed: Temperature and humidity levels of the floor and areas where laminate flooring is to be installed must conform with suitable temperature and relative humidity conditions before installation, during installation and after the process. Laminate flooring must be kept for 48 hours before the installation to fit into the areas where the installation is to be made. (Temperature of the areas where the installation is to be made must be a minimum of +18°C. Floor temperature must be minimum +15°C. Relative humidity rate of the areas where the installation is to be made must be 40-70%). The surface of the floor where the installation is to be made; All surfaces on which laminate flooring is to be installed must be ready for the process, according to the technical conditions that must be considered.
Meet the below-specified conditions, during the floor is being checked:
- Make sure that the floor is completely dry.
- Check the surface flatness. (Fluctuation on the surface must be <2mm in a metre.)
- Check the floor hardness.
- Cleaning the surface of the floor where installation is to be made. (dust, dirt, etc.)
- Installation can be made on concrete or tiles as well
Laminate flooring can also be installed on the floors where water-circulation underfloor heating systems are used. In such a case, please use the craft paper instead of foam.
In addition to these, if electric underfloor heating systems (check the surface temperature) is placed in the cement or concrete layer (if the heating system is not above the concrete layer), it is suitable for installation. The surface temperature of the floor must not exceed maximum 28°C.
In case of getting the guarantee of the surface temperature of the floor will not exceed 28°C from company produces the underfloor heating system, use of adjustable plate heating systems might be allowed as to be used as installation floor. Standard plate-based electric underfloor heating systems available in the market cause the surface temperature to be much higher than 28°C, in case of excessive sudden heat changes. Because of that, it is not suitable as the installation floor.
Unsuitable floors are:
- Textile Material (Carpet, Rugs, etc.)
- PVC, Linoleum, Wood / Laminate Flooring etc.
- Must not be installed on wet surfaces such as toilets, bathrooms or saunas.
- In-vehicle indoor flooring.
Mandatory regulations for installation:
- PE form must be laid on covering all surfaces of floors for moisture insulations of the floor. For the purpose of ensuring sound, heat and moisture insulation in the floor and eliminating roughness of the floor (if less than 2mm), it must be laid parallel to the long side of laminate floor plans and try to cover all the floor installation. While laying the foam strips side by side, they must be laid in adjacent sides (by not leaving any open areas.)
- As laminate flooring is installed on the floor in a floating system, they are not screwed, nailed and not glued on the floor.
- During the installation, a distance of the joints of two short sides definitely must be at least 300mm. In case of products with a curved side and/or special pattern as manufactured by the factory (for example decor tile) you must apply by shifting equally according to the curved side and/or pattern.
- The distance between laminate flooring and fixed edges (walls, heater pipes, etc.) must be 15mm in installation areas.
- Laminate flooring must be installed maximum 10m to the length of the panels and maximum 8m to the width of the panels in installation areas. Transition profiles must be used in areas where these measurements exceed.
- Damaged or unusable panels must be eliminated before and during the installation.
- Our products are manufactured in multiple locations. Please pay attention to our products that are shipped from the same location before starting the installation. Please do not use the products from different locations in the same areas.
- Before starting the installation, please group all products on the bases of their production dates and start using installation preferring materials with the recent dates to each other within the same area.
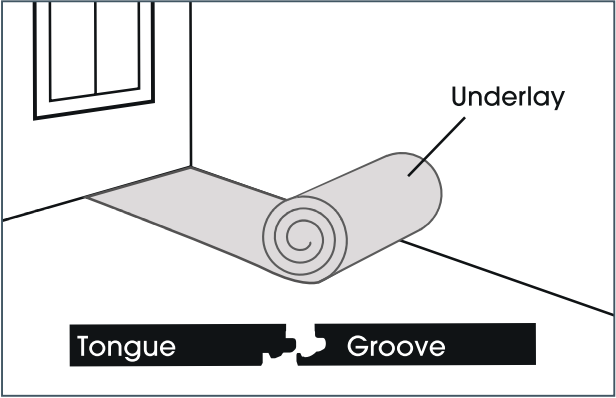
Fig.1
Place the underlay (foam) on the floor and check what tongue and groove profiles are.
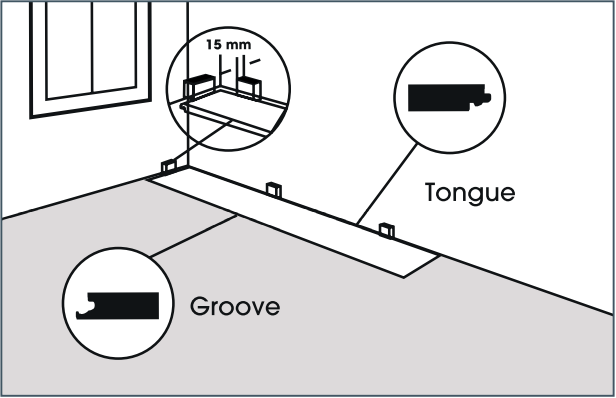
Fig. 2
Start the installation with the first line from the left corner of the room by meeting both tongues click sides or the panel to the wall.
While starting the installation, place the distance protector (a wedge of 15mm thickness) that ensures distance with the wall.
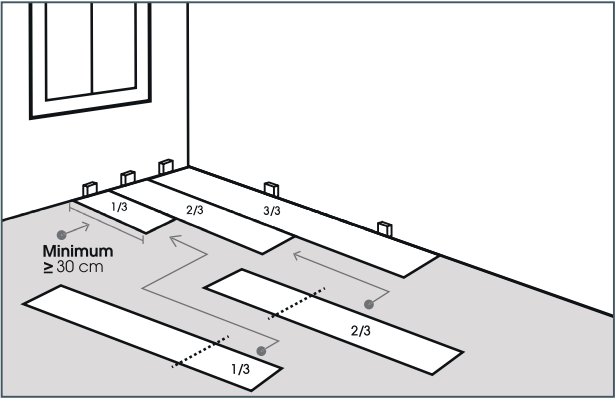
Fig. 3
Place a whole panel whose tongue sides of laminate flooring face the corner. After that cut 2/3 of another panel and connect it to the whole panel whose tongue click sides face the wall,
after that cut 1/3 of another laminate flooring, connect it next to the 2/3 of laminate flooring. So cut side of the 2/3, 1/3 of the panels face to the wall.
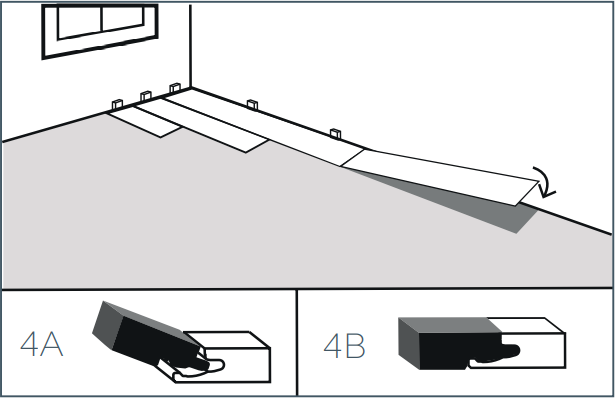
Fig. 4
To continue the created integrity, the tongue click of the panel's short side is placed on the groove click of the panel's short side to get
connected by 30 degrees angles and install by putting down to the floor. For details, please check Fig.4A & 4B)
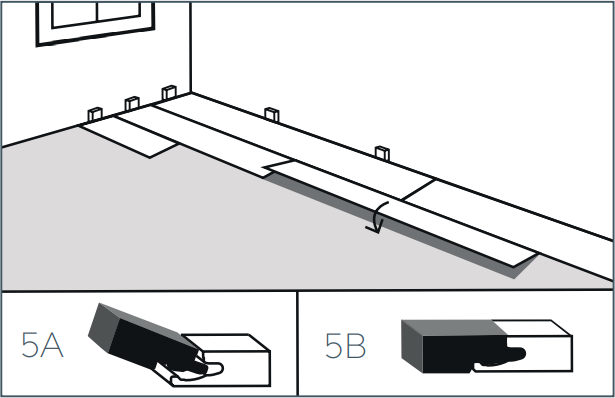
Fig. 5
During installation lock the long side of the panels. For details, please check Fig.5A & 5B.
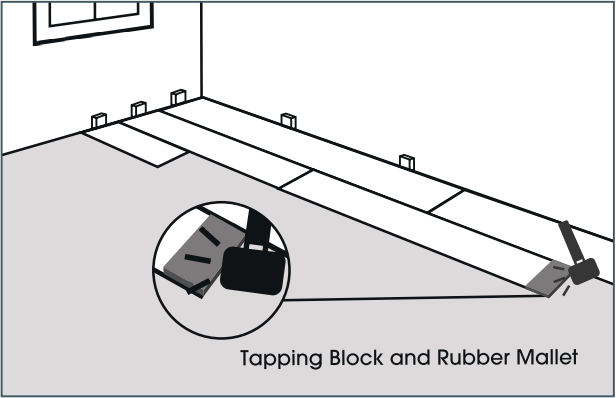
Fig. 6
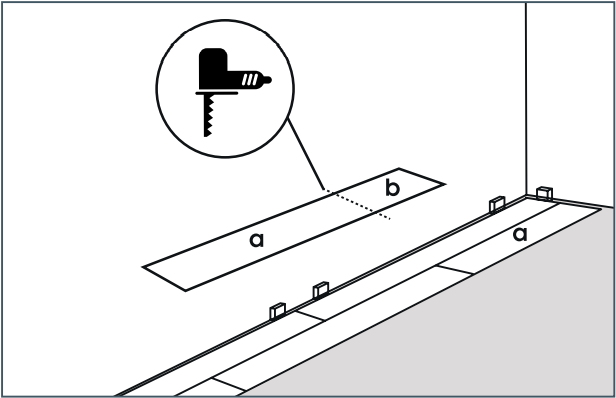
Fig. 7
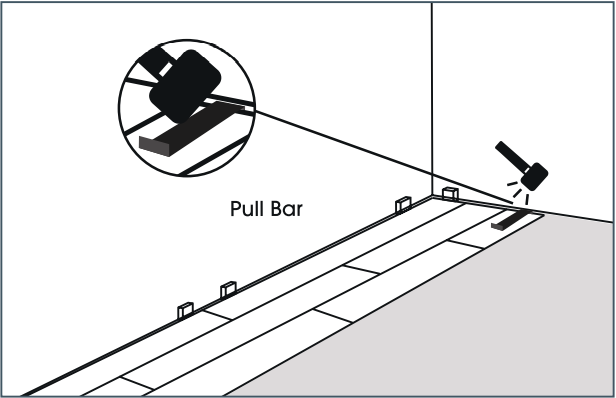
Fig. 8
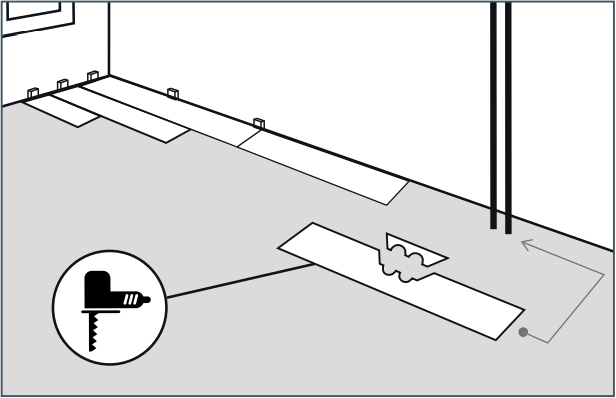
Fig. 9
During the installation, cut the section on the panels which faces the heating pipes by having 15mm gap with fixed areas by convenient
cutting tools. The pieces which were cut are glued to each other with convenient adhesive.
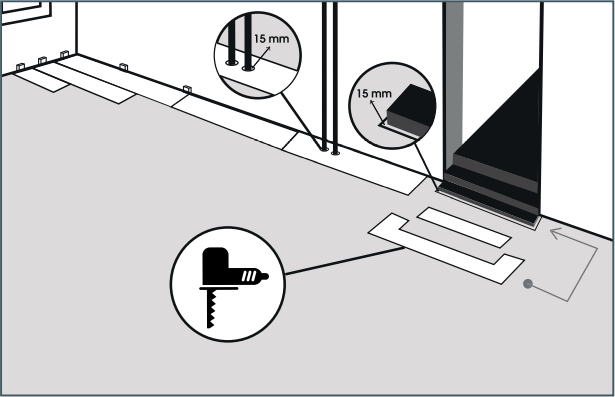
Fig. 10
Laminate flooring is cut on the sides by having a minimum 15mm gap according to the stair step and fit them appropriately.
Fig. 11
Remove all the wedges.
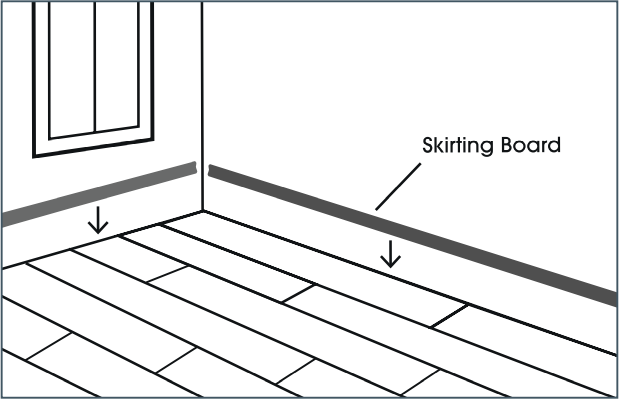
Fig. 12
Skirting boards are cut depending on how they fit to be ready for installation.

Fig. 13
Skirting boards are cut depending on how they fit to be ready for installation.
C) After Installation
- Pieces of plastic or felt must be placed under the fixed of moving furniture legs.
- Please change locations of the heavy furniture by lifting.
- Furniture with wheels. ‘Couches and Seats’ wheels must be soft type.
- Please clean with a well-squeezed microfiber cloth that does not leave any residue, without letting laminate flooring’s surface wet. Our products have TSE Laminate Flooring Standards Certificate and meet the requirements of the relevant standard. Unless otherwise stated on our products, “They are not water-resistant and must be protected against exposure to water.”
- Do not use any abrasive cleaners.
- Do not sand the laminate flooring